Sunday, 2 October 2011
Eastern promise: Growing Lemongrass
Lemongrass (Cymbopogon citrates) is one of the staple ingredients in Asian cuisine, where it is used in everything from soups and curries to green teas. Lemongrass is a frost-tender perennial which can grow up to six feet tall and spread two-three feet wide. Its long, thin bright green leaves are packed with a dense citrus flavour. The stalk and leaves both contain a very distinct and strong aromatic oil called citral, which smells like — you guessed it — lemons!
Now that lemony smell isn’t just refreshing, it also keeps away those tiny blood-sucking terrors we call mosquitoes. While some feel that simply planting lemongrass is enough, the real mosquito-repelling benefit comes from its essential oil, which can work as an effective replacement for commercial insect repellents.
That’s not all. If you are someone who values organic over chemical health and beauty products, lemongrass is just what you need. Lemongrass essential oil is known for its antiseptic and revitalising properties. It’s a perfect natural toner for your skin. It improves circulation, tones muscles, cures acne and neutralises oily skin.
Its diuretic properties promote digestion, remove excess water and toxins from the body and reduce swelling. Being an effective astringent, lemongrass strengthens the contraction of gums and hair follicles resulting in stronger teeth and less hairfall. In case of injuries, it helps in clotting blood quickly.
Lemongrass is valued for its antipyretic (fever-reducing) properties too. A few cups of lemongrass tea can bring down even high fevers. Essential lemongrass oils and teas can also help you recover from depression by uplifting the spirit thanks in no small part to its smell. It helps relieve muscular pains too.
Besides this, lemongrass oil also assists in treating nervous disorders such as shaking hands or limbs, and lack of reflexes by strengthening and activating nerves.
There is good news for lactating mothers. Apart from the innumerable reasons to include lemongrass in your diet, lemongrass oil is also a popular galactagogue agent that not only improves the quality of milk produced but also increases the quantity. However, you must not consume lemongrass if you know you are pregnant because it can lead to a miscarriage.
Growing lemongrass in your garden
Now let’s get down to the nitty-gritty of how to grow this miracle plant.
Lemongrass is hard to germinate from seed but if you are able to get a few seedlings through germination you should be more than happy!
Spread the seeds in a small container filled with sand and compost (70:30) and cover lightly with moist compost. Seal the pot with a plastic bag to maintain the moisture and to control the temperature. With a steady temperature of 20-22 degrees Centigrade, the seeds will germinate in 25-40 days. Fluctuating temperature will result in poor or failed germination.
When the seedlings are large enough to handle, transfer them to individual pots and keep them in partial shade. Since these are tropical plants, they will grow best in moist soil in a sunny spot. Gradually introduce your plants to full sun.
Divide and rule
Personally, I have never grown lemongrass from seeds. Instead, once a year, I divide the plants to propagate them. You can do the same by buying a plant from a nursery. My plant was a present from a friend and it turned out to be one of the best growing plants in my garden. The best time to propagate your plants by dividing is in early spring or autumn. The plant can be separated and replanted as soon as it has developed strong roots. To divide them, carefully remove the entire plant from its pot and shake it gently to loosen the soil but do not remove it all. Carefully separate a stem along with its roots from the others and replant it. Take care of the new plant by watering it and keeping it under partial shade for a few weeks.
Lemongrass can be grown in pots or as a border in your garden. They will love a 12-14 inch container and occasional feed or organic compost. The plants are insect repellents themselves and because of that they are virtually pest-free.
Harvesting and beyond
Summers will bring flowers to lemongrass that will soon produce hundreds of seeds that you can save. Once your plant is three months old, you can start harvesting its leaves by cutting them from the bottom, just near the stem.
You can use them fresh or dry and you can store them in airtight containers to use later.
Freeze your herbs instead of drying
Drying is a classic way to store herbs for later use while preserving the flavour and aroma. However, classic drying means that you will lose the colour. Well, this handy technique lets you preserve the colour as well!
Pick fresh leaves of lemongrass, rinse properly and chop into one inch pieces. Fill your ice cube trays with water and add a few cuttings in each. Most herbs (especially mint) look attractive frozen in an ice-cube and can even be used to add zing to a cold drink.
You can also store lemongrass by making small packets of the herb using butter paper and freezing it in an air tight container.
Every garden should have this fantastic plant that tastes and smells like lemon, cures uncountable illnesses, makes skin beautiful, reduces fat, makes teeth stronger and hair stunning, soothes senses, repels insects and makes the garden greener!
Published in The Express Tribune, Sunday Magazine, October 2nd, 2011.
Environmentalist, sustainability educator and a freelance writer. Co founder of Organic City Pakistan.
Tuesday, 20 September 2011
The War Against Mosquitoes: Protecting your home
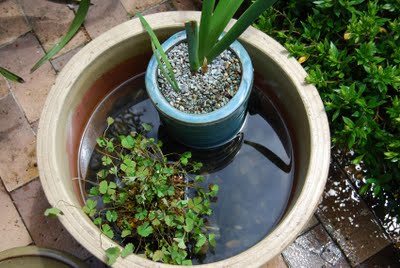
Breeding ground: In the fight against the Aedes mosquito, it is key to remove standing water from all areas around your house and garden.
The enemy is at large and hidden among us. It is attacking us from all sides. It's time to take charge of the situation and take our grounds back!
Track down your enemy!
Watch out for a 2-3 mm black mosquito with white stripes on its legs and body called Aedes, which has, unfortunately, lived up to the literal meaning of its name: "unpleasant."It targets children and adults equally. Its modus operandi includes biting an infected person and then biting another person to spread the sometimes deadly dengue fever virus. Our enemy lives among us in cities and villages in empty pots and discarded containers that hold standing water, and of course water storage tanks, and it has breeding habits different than the mosquito that carries malaria.
We have lost our men, women and children in this war. It's time to declare war against the mosquitoes.
Chose your weapons!
Let's face it. Our enemy is almost invisible and its coming from directions unknown. We can not predict where its going to attack next. It can be us, it can be someone we love.We have two choices. We can use chemical warfare. It will surely kill the enemy, but it will also have some side effects. On the other hand, we can use much safer weapons that will only kill the enemy and protect us without any loss.
Organic Pakistan (a center for agriculture and urban farming) has developed a plan of action using tested and trusted natural control and cure methods that will always work if done properly. The best part is that there are no side effects and the plan is cost effective too!
Mosquito-free homes and workplaces are absolutely essential. Here are a few things you can do to make that happen:
Double your guard
Introduce mosquito-repelling plants around you. Plant rosemary, mint, lemon grass, catnip and marigold in your garden, containers, hanging baskets or window boxes. Mint and marigold are easily available in most nurseries.
Attack on their ground
Do not let water stand in trays under pots and clean your birdbaths once a week.
Make them run for their lives
Mint works like magic to repel insects and has been used as a mosquito repellent for centuries. Hang or place dried mint leaves in a sachet around the house or near windows.
Make your own mint mosquito repellent by taking a few fresh sprigs of mint and fresh citrus peelings and adding boiling water to the mix. Let it sit over night. Strain and add an equal amount of rubbing alcohol. There you have it! Mix it well and use it on your body to repel mosquitoes where ever you go.
![]() |
| Hermal, also known as "wild rue", is a thicket-like herb that has many medicinal properties. |
Smoke them out by using hermal-seed smoke to fumigate your rooms daily.
Heal yourself
The good news is that 80% of infected people have minor symptoms, such as high fever, and only 5% will have severe conditions, while a small number will face life-threatening complications. People suffering from conditions such as diabetes and asthma have more chances of suffering from life-threatening dengue fever.If you suffer from high fever, muscle and joint pain, headaches, pain behind the eyes, nausea and vomiting, you must visit your doctor and follow professional treatment.
Remember, healing doesn't have to be a series of torturous events. These simple and healthy drinks should be part of your treatment plan: i) the juice of a half lemon squeezed into a glassful of fresh apple juice should be taken thrice daily to fight dengue fever; and ii) select your favorite from, or a combination of, grapefruit, guava, bell pepper, tomato and lemon or lime juices to strengthen your immune system.
Make your own herbal tea to recover from dengue fever
Mix one cup each of fresh lemon, ginger and garlic juice and add one cup of apple cider vinegar to it. Bring this mixture to a boil and let it simmer until you are left with three (3) cups. Turn off the heat and let it cool. Once it's cold, add four (4) cups of any honey (preferably acacia honey) and combine the mixture. Use an airtight container to store it in the refrigerator.It's recommended to put two tablespoons of the mixture in a glass of water and drink it daily on an empty stomach.
Remember, the best strategy in any war is to never let down your guard. Your enemy might have the advantage of a surprise attack, but you can be prepared to eventually reverse the situation in your favour. Follow our action plan and buttress your defences. Everything you need to protect yourself is in your home, or close at hand.
published at Newsline Magazine on 20th September,2011 http://www.newslinemagazine.com/category/lifestyle/home/
Environmentalist, sustainability educator and a freelance writer. Co founder of Organic City Pakistan.
Sunday, 18 September 2011
Rethink Mint!
There is arguably no other herb as versatile as mint: whether it is a savoury dish or a dessert, this aromatic herb adds taste with its amazing range of flavours from soothingly mild to pleasantly sharp. It is the perfect finishing touch to put on just about anything that needs a bit of green garnish and sometimes shines through as a star on its own.
Its distinct flavour has made it popular in every culture. Mint adds mellowness to raitas, enhances curries, lends flavour to barbeques and salads alike, refreshes drinks and creates a mouth-watering fusion of sharp and gentle flavours when added to chocolate desserts. A glass of mint lassi on a hot day will leave you refreshed and mint tea on a cold winter evening is something I always look forward to.
This herb is not only popular in the cooking world but is also a well-known digestive aid. It improves circulation, helps in chills, colds, fevers and congestion. Mint tea is used to ease heartburn and nausea.
Is there any reason not to grow this miracle herb in your garden? Absolutely not! So here is how to get started.
Growing mint in your garden
Mint, most commonly known as pudina in the subcontinent, belongs to the family Lamiaceae. The most popular types of mint species are peppermint and spearmint. Mint is a fast spreading perennial that grows best in moist and nutrient rich soil. It thrives in partial shade and a cool place. Summers bring delicate white flowers to these lush, green plants.
Grow mint in your kitchen garden to make use of its anti-parasitic qualities. Mint helps repel aphids, ants, fleas, rats, mosquitoes and while attracting bees that pollinate your garden. Still, the plant is prone to certain diseases, one of which is mint rust, a fungal attack that makes dusty orange or pale yellow spots appear on its stems. It is best to replace the plants with new ones if you see such symptoms.
Mint has invasive roots, so confine the plant into containers where its roots will not spread horizontally and bother other plants.
Although mint plants produce seeds and can be grown using those seeds, it’s an unreliable practice. There is a much faster way to grow your plants by taking root or stem cuttings.
For stem cuttings, simply select a healthy stem and make a cutting of about 8cm. Pinch off the new growth and plant this new stem into the soil. Water and cover with a plastic bag to retain moisture, so that the new seedlings will not dry out. For root cuttings, water your plant a day ahead. Carefully take out the plant and use a sharp gardener’s knife or a cutter to divide the roots and re-pot each new plant into large containers.
In a few weeks you will have your own new dense mint plants. Simply pick some sprigs to add a little minty surprise to your favourite appetiser, meal, beverage, or dessert.
Go plant some mint and enjoy every bit of this remarkable herb!
Pick your favorite Mint Tea
Nane limon
Nane-limon ( mint-lemon) is a famous Turkish mint tea that is made by squeezing a lemon wedge and infusing a spring of mint into boiling water. It is usually served as a after dinner beverage to benefit from its digestive properties.
Sauf-Pudina
Sauf Pudina ka paani or fennel and mint tincture is famously used as a local remedy to ease discomfort and regain energy during dehydration or diarrhea. To make this refreshing drink, boil a tablespoon of fennel seeds with a bunch of mint leaves. Refrigerate and take a few sips several times a day.
Make you own blend
Mint goes well with most of the herbs such as lavender. You can make ginger mint tincture or add mint to punjabi masala chai. There are endless combinations to try so what are you waiting for ? Go plant some mint and enjoy every bit of this remarkable herb !
Published in The Express Tribune, Sunday Magazine, September 18th, 2011.
Environmentalist, sustainability educator and a freelance writer. Co founder of Organic City Pakistan.
Sunday, 4 September 2011
Gardening: Ra-ra-radishes!
A fast-maturing vegetable that can grow in small spaces and is flavourful to boot — sounds like an urban farmer’s dream. Such is the radish or laal mooli, a well-established crop since Roman times, which is still popular among farmers for all these reasons.
The red-skinned and white-fleshed vegetable is a globe with a diameter of around an inch. Both the root and the leaves are used for culinary purposes. Radishes are loved for their bright red colour and sweet, mild flavour. Although there are a variety of different shapes, colours and tastes among radishes, the tiny globes with the blushing red colour are unbeatable!
Try growing each variety as it takes only 20 days for this wonder crop to mature from sowing.
Sowing seeds
Radishes can easily be grown in small or large containers or trays if you do not have a patch to grow your vegetables on.
Randomly scatter the seeds two inches apart and lightly cover them with compost. Plant seeds in small rows after every 10-15 days. Remember that it is better to sow a small amount than have a large amount of radishes ready to harvest at the same time.
As indicated by the Greek name of its genus, Raphanus meaning “quickly appearing”, the seeds sprout within two days. That they grow so fast makes radishes suitable for plant projects children could work on.
Growing radishes in your garden
Radishes would grow best in a well-drained, rich, loamy soil. It is a crop for the cool season. For a winter harvest, plant seeds as soon as you see autumn emerge from summers. Give radish seedlings a minimum of 6-8 hours of sunlight and water them regularly. Irregular watering will blot their skins.
This fast-growing crop can be planted along with slow growing counterparts to avail the unused spaces in the garden: Carrots, onions, marigolds, lettuce, cabbages, beans and tomatoes enjoy the company of these bright red veggies.
Harvesting and beyond
Radishes should be picked as soon as the spheres reach an inch in diameter. Leaving them for a slightly longer time would change the taste from a desirable, pleasant tang to an unwanted spiciness. If picked at the right time, radishes make a variety of dishes tasteful. The flesh and seeds are also edible and add crunchiness to salads.
The greens can be refrigerated for about 2-3 days and the vegetables for about a week. But for a truly scrumptious treat, eat them fresh!
Storing seeds for sowing
Leave a few plants growing beyond maturity to encourage seeding. Left like that, radishes produce flowers that turn into seedpods. These seedpods contain seeds that can produce many more radishes. Simply let seedpods mature and dry on the stalk. Carefully open up each seedpod and collect seeds in a dish. Let the seeds dry for two days in direct sunlight. They would then be ready to store in an airtight container or a sealed bag.
A green idea
Storing seeds is a rewarding practice for any farmer. The quality of seeds produced depends on growing methods adopted and the seeds that the plants were started from. Make sure that the seeds you start off with come from an organic source and are not hybrids. Avoid chemicals on plants and keep them pest and weed free.
Published in The Express Tribune, Sunday Magazine, September 4th, 2011.
The red-skinned and white-fleshed vegetable is a globe with a diameter of around an inch. Both the root and the leaves are used for culinary purposes. Radishes are loved for their bright red colour and sweet, mild flavour. Although there are a variety of different shapes, colours and tastes among radishes, the tiny globes with the blushing red colour are unbeatable!
Try growing each variety as it takes only 20 days for this wonder crop to mature from sowing.
Sowing seeds
Radishes can easily be grown in small or large containers or trays if you do not have a patch to grow your vegetables on.
Randomly scatter the seeds two inches apart and lightly cover them with compost. Plant seeds in small rows after every 10-15 days. Remember that it is better to sow a small amount than have a large amount of radishes ready to harvest at the same time.
As indicated by the Greek name of its genus, Raphanus meaning “quickly appearing”, the seeds sprout within two days. That they grow so fast makes radishes suitable for plant projects children could work on.
Growing radishes in your garden
Radishes would grow best in a well-drained, rich, loamy soil. It is a crop for the cool season. For a winter harvest, plant seeds as soon as you see autumn emerge from summers. Give radish seedlings a minimum of 6-8 hours of sunlight and water them regularly. Irregular watering will blot their skins.
This fast-growing crop can be planted along with slow growing counterparts to avail the unused spaces in the garden: Carrots, onions, marigolds, lettuce, cabbages, beans and tomatoes enjoy the company of these bright red veggies.
Harvesting and beyond
Radishes should be picked as soon as the spheres reach an inch in diameter. Leaving them for a slightly longer time would change the taste from a desirable, pleasant tang to an unwanted spiciness. If picked at the right time, radishes make a variety of dishes tasteful. The flesh and seeds are also edible and add crunchiness to salads.
The greens can be refrigerated for about 2-3 days and the vegetables for about a week. But for a truly scrumptious treat, eat them fresh!
Storing seeds for sowing
Leave a few plants growing beyond maturity to encourage seeding. Left like that, radishes produce flowers that turn into seedpods. These seedpods contain seeds that can produce many more radishes. Simply let seedpods mature and dry on the stalk. Carefully open up each seedpod and collect seeds in a dish. Let the seeds dry for two days in direct sunlight. They would then be ready to store in an airtight container or a sealed bag.
A green idea
Storing seeds is a rewarding practice for any farmer. The quality of seeds produced depends on growing methods adopted and the seeds that the plants were started from. Make sure that the seeds you start off with come from an organic source and are not hybrids. Avoid chemicals on plants and keep them pest and weed free.
Published in The Express Tribune, Sunday Magazine, September 4th, 2011.
Environmentalist, sustainability educator and a freelance writer. Co founder of Organic City Pakistan.
Sunday, 21 August 2011
Outstanding Okra!
Since time immemorial, South Asia farmers have cherished Okra or Bhindi — a vegetable that originated in Africa. These dark green, tender seed pods were a favourite of Cleopatra of Egypt. Today, after travelling from Ethiopia to North Africa, the eastern Mediterranean, Arabia and India, they have found their way to the fields of urban farmers in Pakistan.
However, this is not where their journey ends; you can start your own kitchen garden by simply planting some Okra seeds in containers where ever you find a sunny spot in your house or apartment.
Sowing Seeds
Sow the seeds 1 inch deep and 12 inches apart, directly into well-worked soil. If you are using containers, use a 14 inch container for each seed. If you wish to plant the seeds in your vegetable patch, make rows which are 36 inches apart.
For fast germination, soak the seeds for a few hours before you plant them. For best results, use 30% organic compost and 70% soil.
Growing Okra in your garden
Okra seedlings sprout within 2-3 weeks and after a passage of 4 weeks you can harvest your first Okra pods. The plant grows up to 40 inches tall and spreads around 30 inches in width.
Your plants will love regular watering patterns. Water 1 ½ inch each week and do not let the soil dry out or become too wet. The Okra plant also loves a treat of organic fertilizer every 3-4 weeks.
Peppers, tomatoes, basil, onions and garlic are the best companion plants for Okra. They help repel pests, and if grown together in same soil they will help each other grow better.
To avoid pest build up, plant okra on a different patch in your garden each season.
Harvesting and beyond
Okras first blossom as stunning yellow flowers with a crimson center and then quickly turn into tender pods.
Watch closely! Do not let the pods become hard. Harvest Okra as soon as the pods reach 3-4 inches — freshly picked Okra tastes
For harvesting, cut the pods from the stem just above the cap.
Farmers around the country plant Okra from February to September. Unlike seasonal vegetables, Okra can become perennial in some conditions, which means you can enjoy harvesting vegetables the next season too.
You can get an extra winter crop by pruning your plants to 2 inches after its yield in summer. Soon the plant will produce new shoots and more vegetables.
best.
Store Seeds for the next season
Okra is a seedpod itself. Imagine how many seeds your plants produce each season? Why not save some to plant again or share some with fellow gardeners?
You simply need to scoop out all the seeds and put them in a glass filled with water. Let them soak for some time. Some seeds will sink to the bottom and some will remain afloat. Dispose off the water along with the seeds that are floating. Sun dry the seeds that are left and store them in an air tight container.
Be an Organic farmer
There is nothing like growing your own organic food — the feeling of picking your first home grown vegetables is unmatched. Make a resolution to yourself — Whatever you grow, you will grow it organically. Allow nature to do all the work for you.
To take a step in this direction, start your own exotic kitchen garden by planting Okra this season!
Published in The Express Tribune, Sunday Magazine, August 21st, 2011.
However, this is not where their journey ends; you can start your own kitchen garden by simply planting some Okra seeds in containers where ever you find a sunny spot in your house or apartment.
Sowing Seeds
Sow the seeds 1 inch deep and 12 inches apart, directly into well-worked soil. If you are using containers, use a 14 inch container for each seed. If you wish to plant the seeds in your vegetable patch, make rows which are 36 inches apart.For fast germination, soak the seeds for a few hours before you plant them. For best results, use 30% organic compost and 70% soil.
Growing Okra in your garden
Okra seedlings sprout within 2-3 weeks and after a passage of 4 weeks you can harvest your first Okra pods. The plant grows up to 40 inches tall and spreads around 30 inches in width.
Your plants will love regular watering patterns. Water 1 ½ inch each week and do not let the soil dry out or become too wet. The Okra plant also loves a treat of organic fertilizer every 3-4 weeks.
Peppers, tomatoes, basil, onions and garlic are the best companion plants for Okra. They help repel pests, and if grown together in same soil they will help each other grow better.
To avoid pest build up, plant okra on a different patch in your garden each season.
Harvesting and beyondOkras first blossom as stunning yellow flowers with a crimson center and then quickly turn into tender pods.
Watch closely! Do not let the pods become hard. Harvest Okra as soon as the pods reach 3-4 inches — freshly picked Okra tastes
For harvesting, cut the pods from the stem just above the cap.
Farmers around the country plant Okra from February to September. Unlike seasonal vegetables, Okra can become perennial in some conditions, which means you can enjoy harvesting vegetables the next season too.
You can get an extra winter crop by pruning your plants to 2 inches after its yield in summer. Soon the plant will produce new shoots and more vegetables.
best.
Store Seeds for the next season
Okra is a seedpod itself. Imagine how many seeds your plants produce each season? Why not save some to plant again or share some with fellow gardeners?
You simply need to scoop out all the seeds and put them in a glass filled with water. Let them soak for some time. Some seeds will sink to the bottom and some will remain afloat. Dispose off the water along with the seeds that are floating. Sun dry the seeds that are left and store them in an air tight container.
Be an Organic farmer
There is nothing like growing your own organic food — the feeling of picking your first home grown vegetables is unmatched. Make a resolution to yourself — Whatever you grow, you will grow it organically. Allow nature to do all the work for you.
To take a step in this direction, start your own exotic kitchen garden by planting Okra this season!
Published in The Express Tribune, Sunday Magazine, August 21st, 2011.
Environmentalist, sustainability educator and a freelance writer. Co founder of Organic City Pakistan.
Subscribe to:
Posts (Atom)
further reading
crops in pots